
LA FABRICATION
Les bijoux Res Mirum sont fabriqués par nos soins, dans notre atelier, situé à Roanne dans la Loire.
Voici les différentes étapes de la fabrication.
INSPIRATIONS
En premier lieu, nous choisissons une thématique, autour d’une des nombreuses sources d’inspiration que nous apporte l’Histoire.
Commence alors une étape importante de recherche documentaire. Un travail de collecte de données, d’images et d’informations, qui va nous servir à nous « imprégner » de cette thématique afin de la retranscrire à notre manière.

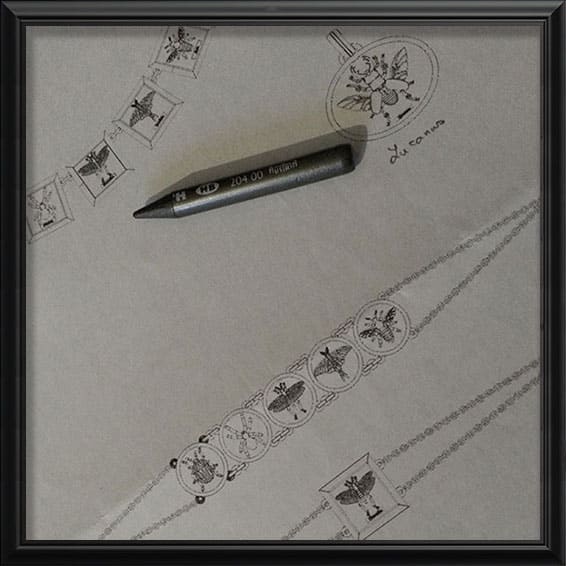
CROQUIS
Nous réalisons les premiers dessins à plat, premières esquisses des futurs bijoux qui composeront la ligne.
Ce sont des dessins réalisés parfois au crayon, ou souvent directement grâce à l’outil informatique, via des logiciels de DAO.
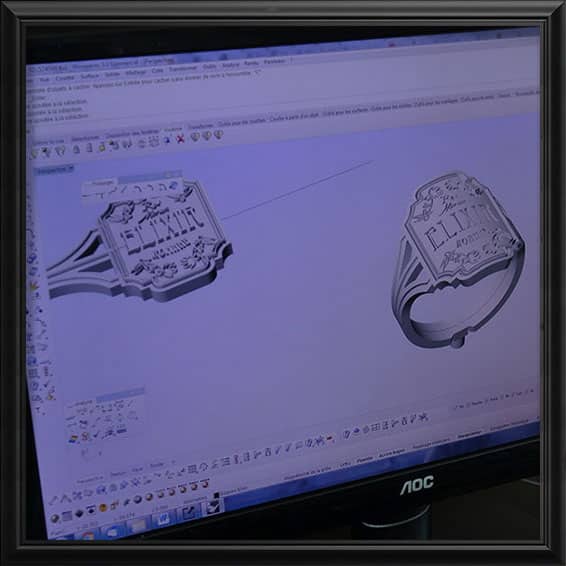
MODELISATION 3D
Nous allons ensuite modéliser les bijoux virtuellement, sur ordinateur, en 3 dimensions, à l’aide de logiciels de CAO.
On appelle cela des prototypes numériques ; ils nous permettent d’appréhender le relief, et de mettre au point certains aspects techniques : systèmes de fermoirs ou d’articulation, poids…
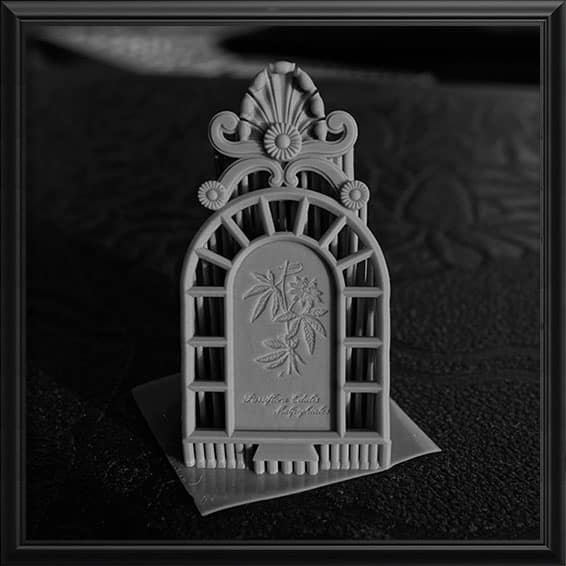
IMPRESSION
Grâce à une imprimante 3D, nous pouvons imprimer en résine la modélisation 3D précédemment réalisée.
La pièce est imprimée avec des supports, sorte de petits picots qu’il va falloir couper pour en extraire le prototype physique. Travail délicat et fastidieux. Le résultat obtenu nous permet d’apprécier l’aspect « réel » du futur bijou ; finesse des détails, proportions…
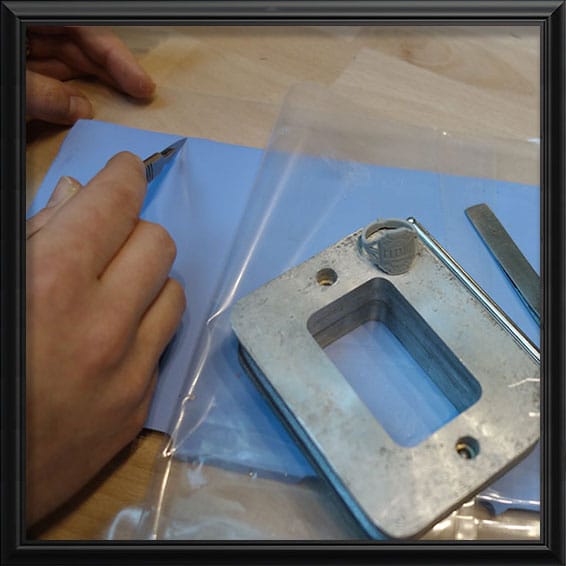
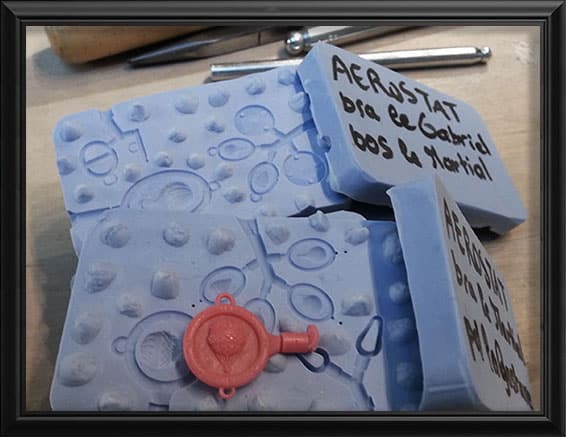
MOULE SILICONE
De cette pièce en résine, nous allons faire un moule.
Ce moule est constitué d’une matière molle, silicone ou caoutchouc. Le principe est d’emprisonner la pièce en résine à l’intérieur de cette matière, et de cuire l’ensemble à 90° ; on appelle cela la vulcanisation. La matière devient alors souple, on coupe le moule en deux pour en extraire le prototype, qui a donc laissé son empreinte dans la matière.
INJECTION
Dans ce moule, nous injectons de la cire, devenue liquide après avoir été portée à 60° à l’aide d’un injecteur.
Cette cire se présente comme de la cire de bougie ; en refroidissant, elle redevient solide. Quelques secondes après injection, il suffit alors d’ouvrir le moule pour récupérer notre cire, exacte reproduction de notre prototype initial en résine.
FONTE A CIRE PERDUE
Un moule en plâtre de la cire est réalisé, qui va permettre de la « transformer » en une fonte en argent 925‰.
On vient placer la cire dans un cylindre en métal, puis couler du plâtre tout autour ; le plâtre va ensuite durcir, et on va placer ce cylindre dans un four à 1000° afin que le plâtre cuise. La pièce en cire se sera évaporée dans l’opération ; dans la cavité qu’elle aura laissée, on viendra faire couler de l’argent en fusion (liquide, porté à près de 1000°). Une fois refroidi, on casse le moule en plâtre pour récupérer la pièce en argent qu’on appelle une fonte ; l’ensemble du processus, connu depuis l’antiquité, est appelé « fonte à cire perdue » car la cire disparaît pour laisser place à la fonte.

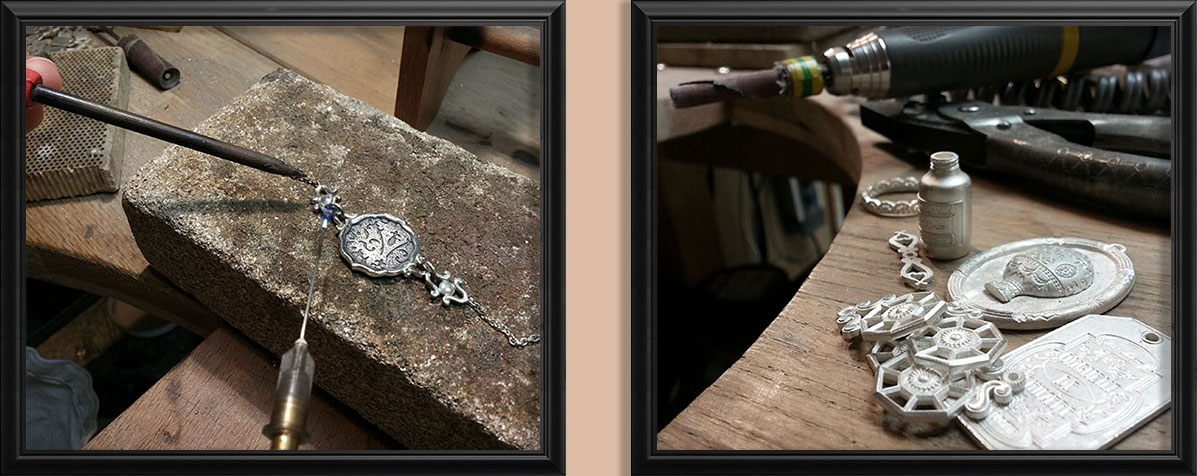
FINALISATION DU BIJOU
Ne reste plus alors qu’à donner à cette fonte l’aspect du bijou fini.
Couper les queues de fonte, poncer, ajuster les différentes pièces qui composent certains bijoux et les assembler, braser et riveter, monter les chaînes, les fermoirs, donner la patine ancienne au bijou… toutes ces opérations que nous effectuons bien entendu nous-mêmes transforment littéralement la fonte en bijou.
PRÉSENTATION DU BIJOU
Enfin nous l’exhibons fièrement dans notre cabinet de bijouterie de curiosités.
Sur un salon ou sur internet, il attendra qu’un·e curieux·se vienne à passer et se l’approprier…

A L’ATELIER
